
There’s a certain magic to a beautiful hardwood staircase. It’s a statement of timeless appeal, a piece of your home’s architecture that deserves to be celebrated. Yet, for all its elegance, a bare staircase can sometimes feel a little… unadorned? Plain? Or cold? And we see it as a blank canvas, waiting to become a design statement.
Introducing a stair runner is the perfect way to weave in personality, warmth, and a splash of pattern, all while protecting that cherished wood from the gentle patina of daily life. But the thought of drills, nails, and adhesives can be daunting. So, how do you enhance your staircase without compromising its integrity?
The good news is that with care, patience, and the right approach, you can achieve a professional-looking installation that leaves your hardwood completely unscathed. It’s all about honouring the craft of your home, just as we honour the craft of our loom.
The Foundation: Preparation is Everything
Before a single tack is placed, the true secret to a flawless, damage-free installation lies in meticulous preparation.
Gather Your Tools with Intention
Having the right tools at hand isn’t just about efficiency; it’s about precision and care. To install a runner on hardwood in a damage-free way, you’ll need:
-
A high-quality, heavy-duty double-sided carpet tape specifically designed for delicate floors.
-
A knee kicker (for a truly taut fit, though this can be tricky for first-timers).
-
A carpet tucker to press the runner neatly into the corners between the tread and riser.
-
A staple gun (to be used with extreme caution and only where it will be completely hidden).
-
A measuring tape, sharp scissors or a utility knife, and a straight edge.
Measure Twice, Cut Once
We’re gonna say that again… Measure twice, cut once. This old adage is the heart of artisan craftsmanship. Measure the length and width of your staircase with precision. For the length, measure over the nose of each tread and down each riser, and consider adding a little extra to allow for a perfect, custom fit at the top and bottom. There’s a particular confidence that comes from knowing your materials are cut to perfection.
The All-Important Underpad
Never, ever skip the underpad. This humble layer is your hardwood’s best friend and the key to a luxuriously soft underfoot experience. It provides essential cushioning, reduces noise, and creates a protective barrier between your runner and the stair treads. For a truly damage-free approach, ensure your underpad is also secured with double-sided tape, avoiding any adhesives that could leave a residue.
The Art of the Installation: A Step-by-Step Guide
Now for the main event. This is where your vision begins to take shape, transforming your hallway with heritage-inspired elegance.
Securing the Underpad with Care
Cut your underpads to fit each tread and riser perfectly. Using strips of double-sided tape on the back of each pad, press them firmly into place on the clean, dry hardwood. The goal is to prevent any shifting during the installation of the runner itself, without a single mark on your stairs.
Positioning Your Runner for a Flawless Finish
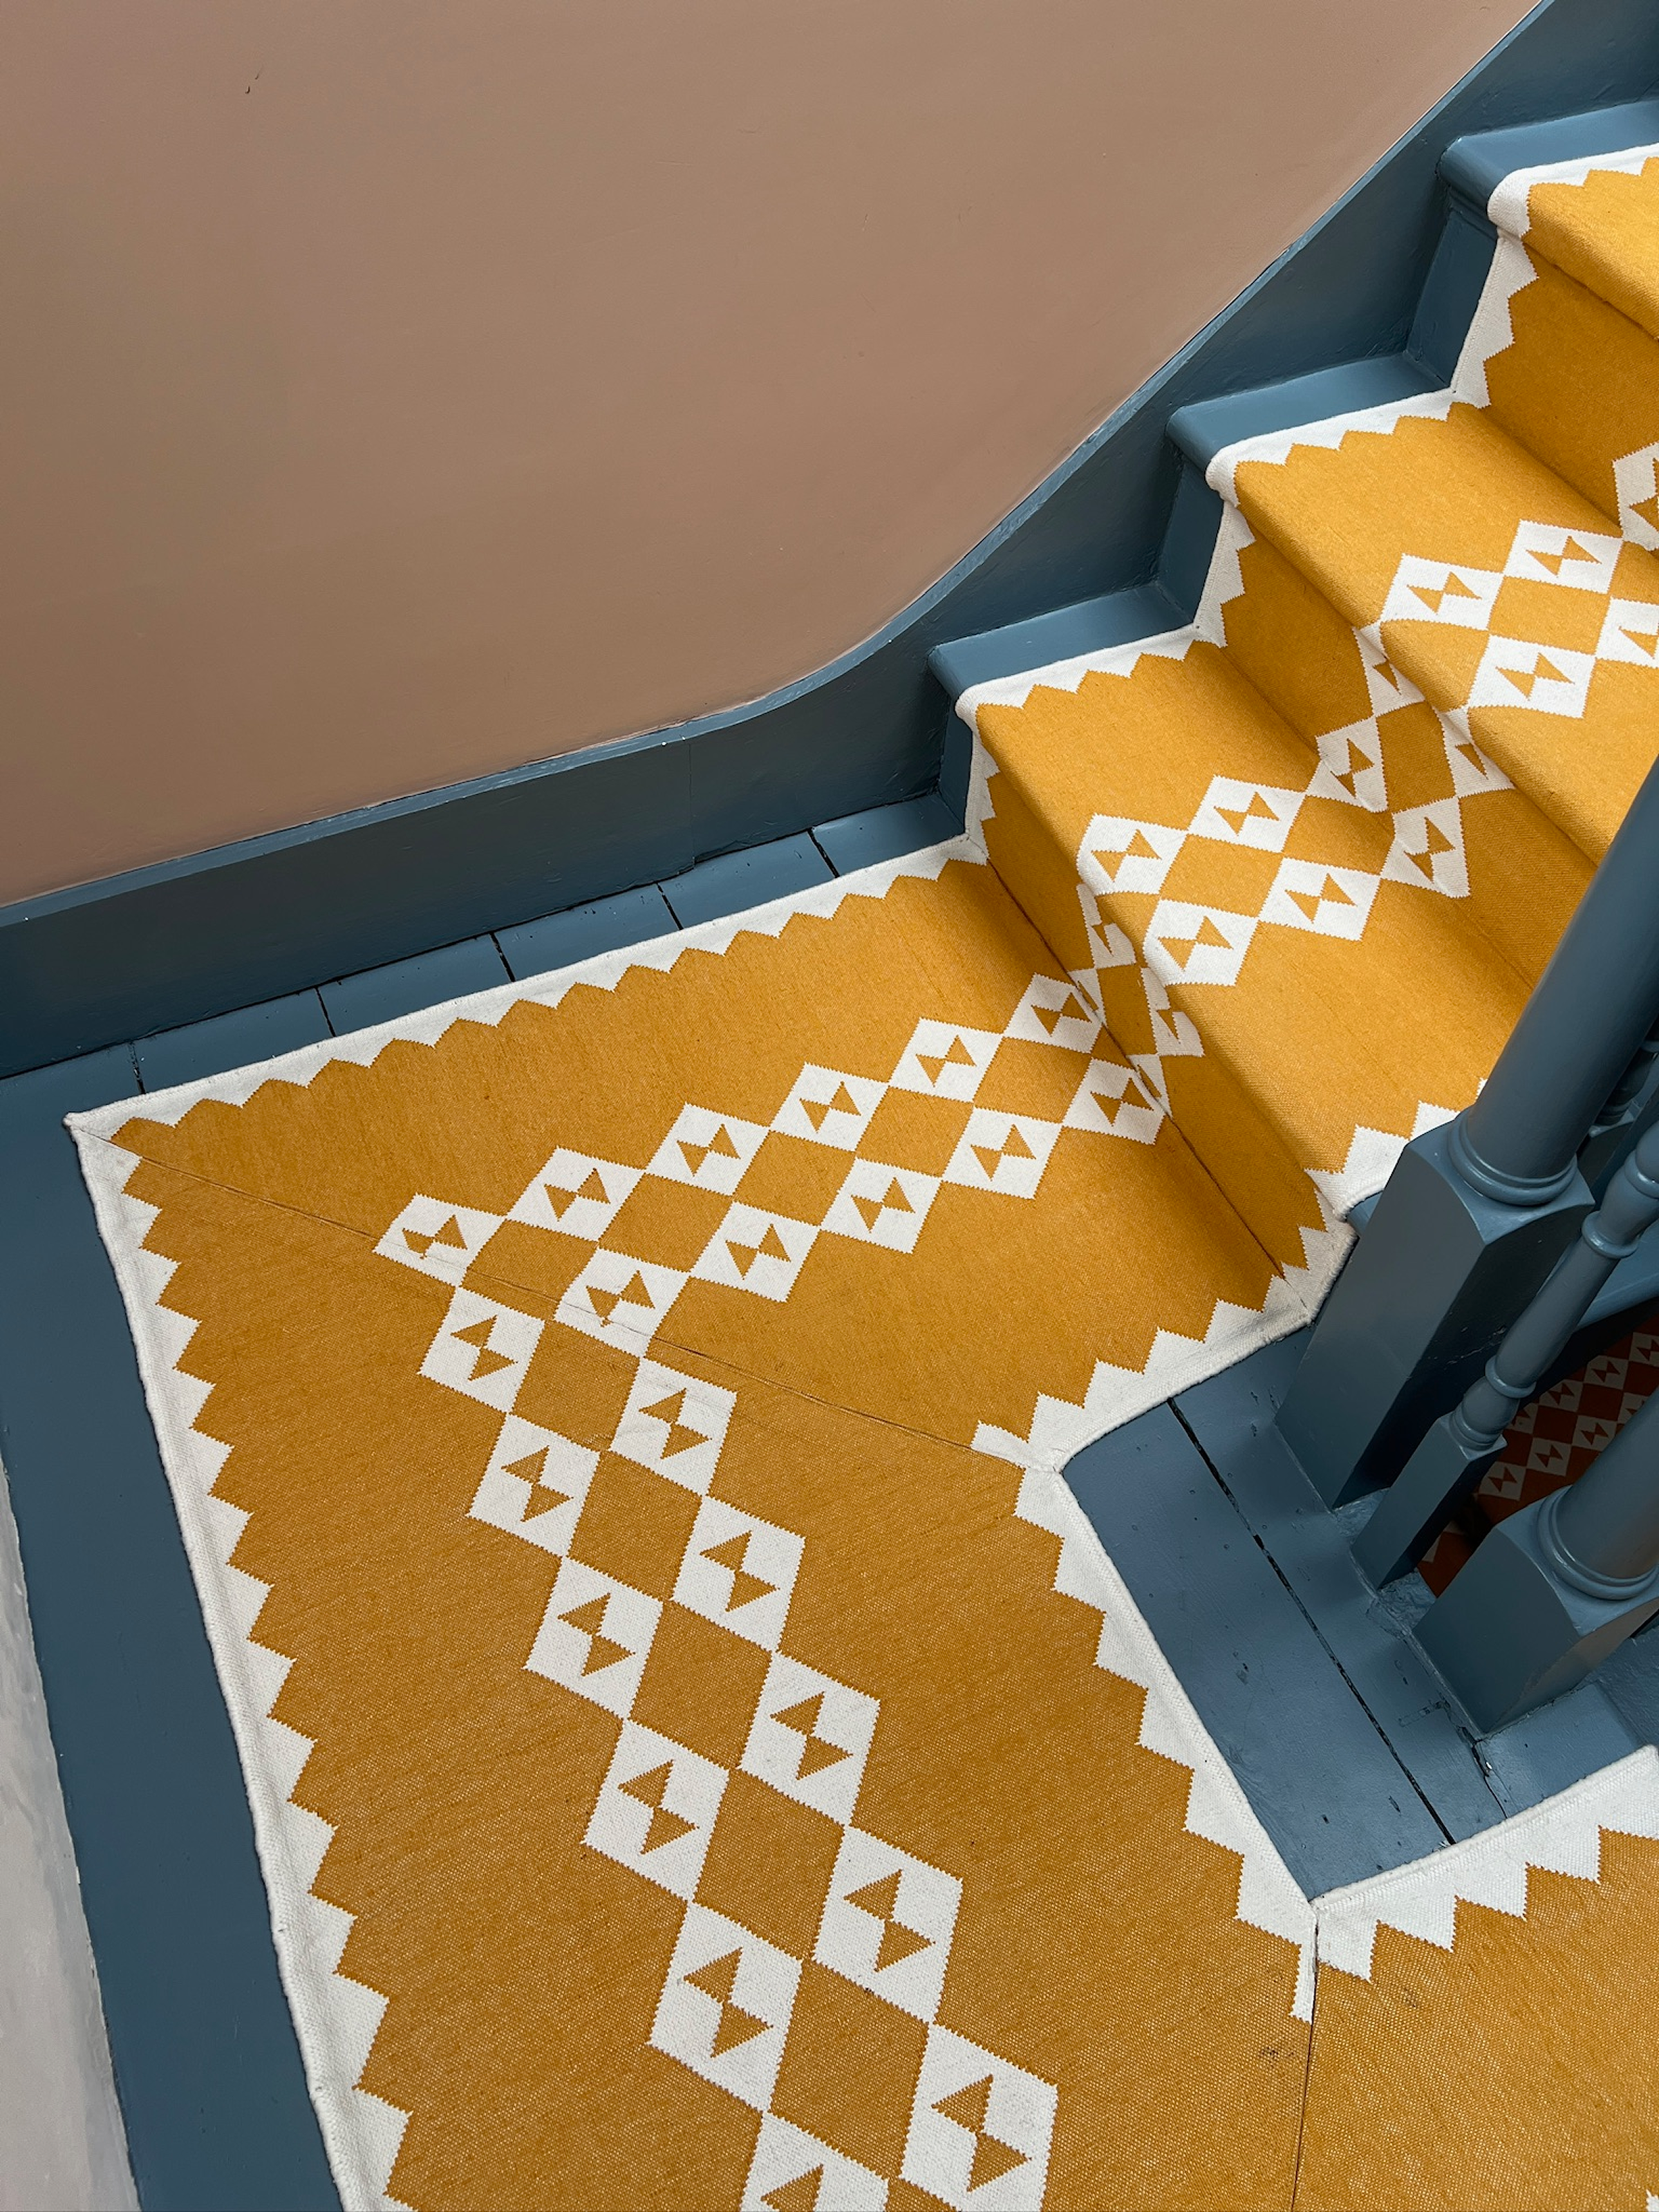
Begin at the bottom of your staircase. Lay your runner centrally, using a measuring tape to ensure an equal overhang on each side. Take a moment to admire how the colours and textures you’ve chosen bring a new warmth and cheer to the space. Slowly walk the runner up the stairs, adjusting as you go to maintain a perfectly straight and centred position.
The Damage-Free Securing Method
This is the most critical step. We recommend a combination of hidden staples and strategic tension:
-
At the Back of the Tread: At the very back of each tread, where it meets the riser, you can discreetly use one or two staples to hold the runner and underpad in place. This spot will be completely covered when the runner wraps over the next tread’s nosing, rendering the staples invisible and safely away from the main, visible surface of your hardwood.
-
The Power of Tension: For the rest of the installation, rely on the natural tension of a well-fitted runner. By keeping the pull consistent and using a carpet tucker to neatly fold the runner into the corner of each tread and riser, you create a secure fit that doesn't rely on invasive fastenings.
Navigating Tricky Spots with Confidence
Every staircase has its own character, often defined by its unique challenges. Handling these with finesse is what separates a good installation from a great one.
Dealing with Landings
A landing requires a seamless transition. If your runner continues across a landing, treat it as a large, flat tread. Ensure the underpad is securely taped down, and if necessary, you can use a few discreet staples at the very edges where they will be covered by the runner’s binding or subsequent stairs.
Wrapping the Nose of the Tread
The graceful curve of the stair nosing is a focal point. To achieve a smooth, professional wrap, make small, careful relief cuts in the runner’s backing at the corners. This allows the fabric to lie flat without buckling. Use your carpet tucker to achieve a crisp, clean fold that speaks of refined taste.
The Finishing Touches at Top and Bottom
How you begin and end the journey matters. At the bottom, you might choose a simple, clean end fixed with hidden staples beneath the first tread. At the top, a sleek threshold bar—which can be fixed into the top riser rather than the floor—can provide a polished finish without impacting your upstairs landing hardwood.
A Commitment to Your Home’s Heritage
Choosing to install a runner in this thoughtful way is more than a weekend project; it’s a nod to a philosophy of quality over quantity. It’s about making considered changes to your home that enhance, rather than detract from, its enduring character.
Why This Approach Honours Your Home
Your hardwood staircase was built to last. By using a reversible, damage-free installation method, you are preserving its story for future generations. You’re adding a layer of your own narrative—the joy and pattern of a beautiful runner—without erasing what came before. It’s a celebration of effortless elegance that respects the past.
The Joy of a Transformative Change
Once the final step is complete, and you see the cascade of colour and texture flowing down your stairs, the true transformation reveals itself. The functional becomes fabulous. The hallway is filled with a new warmth, each step is softened underfoot, and the entire space feels elevated with a sophisticated, personal touch. It’s a change that brings daily joy.
When to Call in the Artisans
While this guide empowers you to create a beautiful result, there is no substitute for a highly skilled hand. For intricate patterns, precious materials, or a truly bespoke fit that demands an artisan’s eye, enlisting a professional fitter is always a wise choice. They bring a lifetime of expertise to ensure your runner is installed to the highest standard, honouring both the craftsmanship of your home and the craftsmanship of the weave.
The Final Step: A Staircase Transformed, A Home Enhanced
As you stand back and admire your handywork, the true reward reveals itself. It’s found not just in the visual beauty of the pattern flowing down your stairs, but in the quiet confidence of knowing you’ve achieved something wonderful. You’ve woven a new layer of personality into the very fabric of your home, all while acting as the most thoughtful custodian of its original charm.
The gentle padding underfoot, the splash of colour that greets you each morning, the knowledge that the heart of your home—its beautiful hardwood—is preserved for the future… this is the real transformation. It’s a testament to the idea that the way we curate our spaces should always be with a gentle touch and an eye for enduring elegance.
Share:
The Art of Designing Stair Patterns
How Wide Should a Stair Runner Be? A Guide to Sizing Your Perfect Runner